Integrate Newentor Wireless Pool Thermometer 433MHZ into Home Assistant using ESP32, CC1101, and OpenMQTTGateway.

| | Allgemein, Programmierung

In this blog post, I will show you how I integrated my pool radio sensor into Home Assistant. I used an ESP32 and a CC1101 radio module for this. If you also want to monitor your pool, this guide is perfect for you.

Required Components

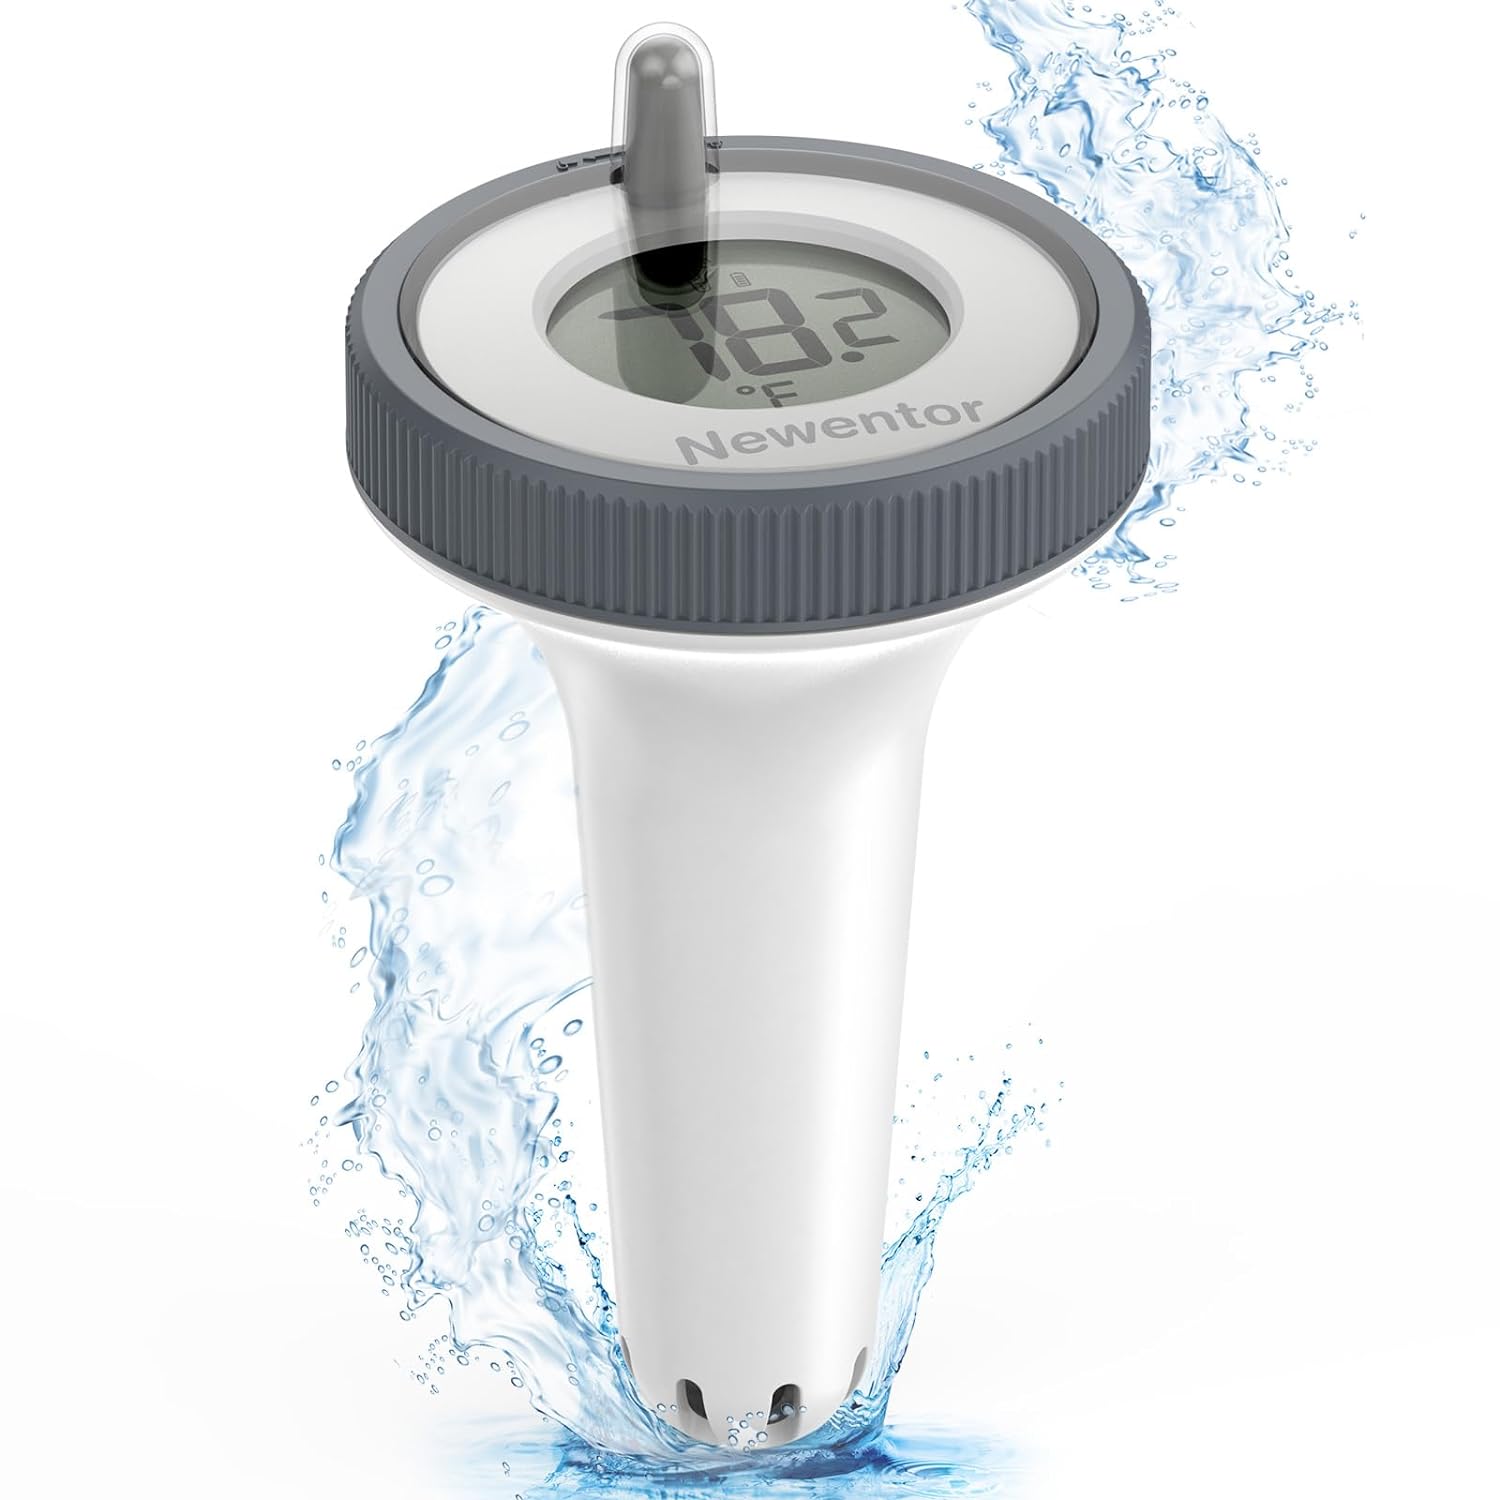
  1. Pool Radio Sensor[*]
  2. ESP32[*]
  3. CC1101 Radio Module / 433MHZ[*]
  4. OpenMQTTGateway
  5. Home Assistant with MQTT Integration

Step 1: Set Up Hardware

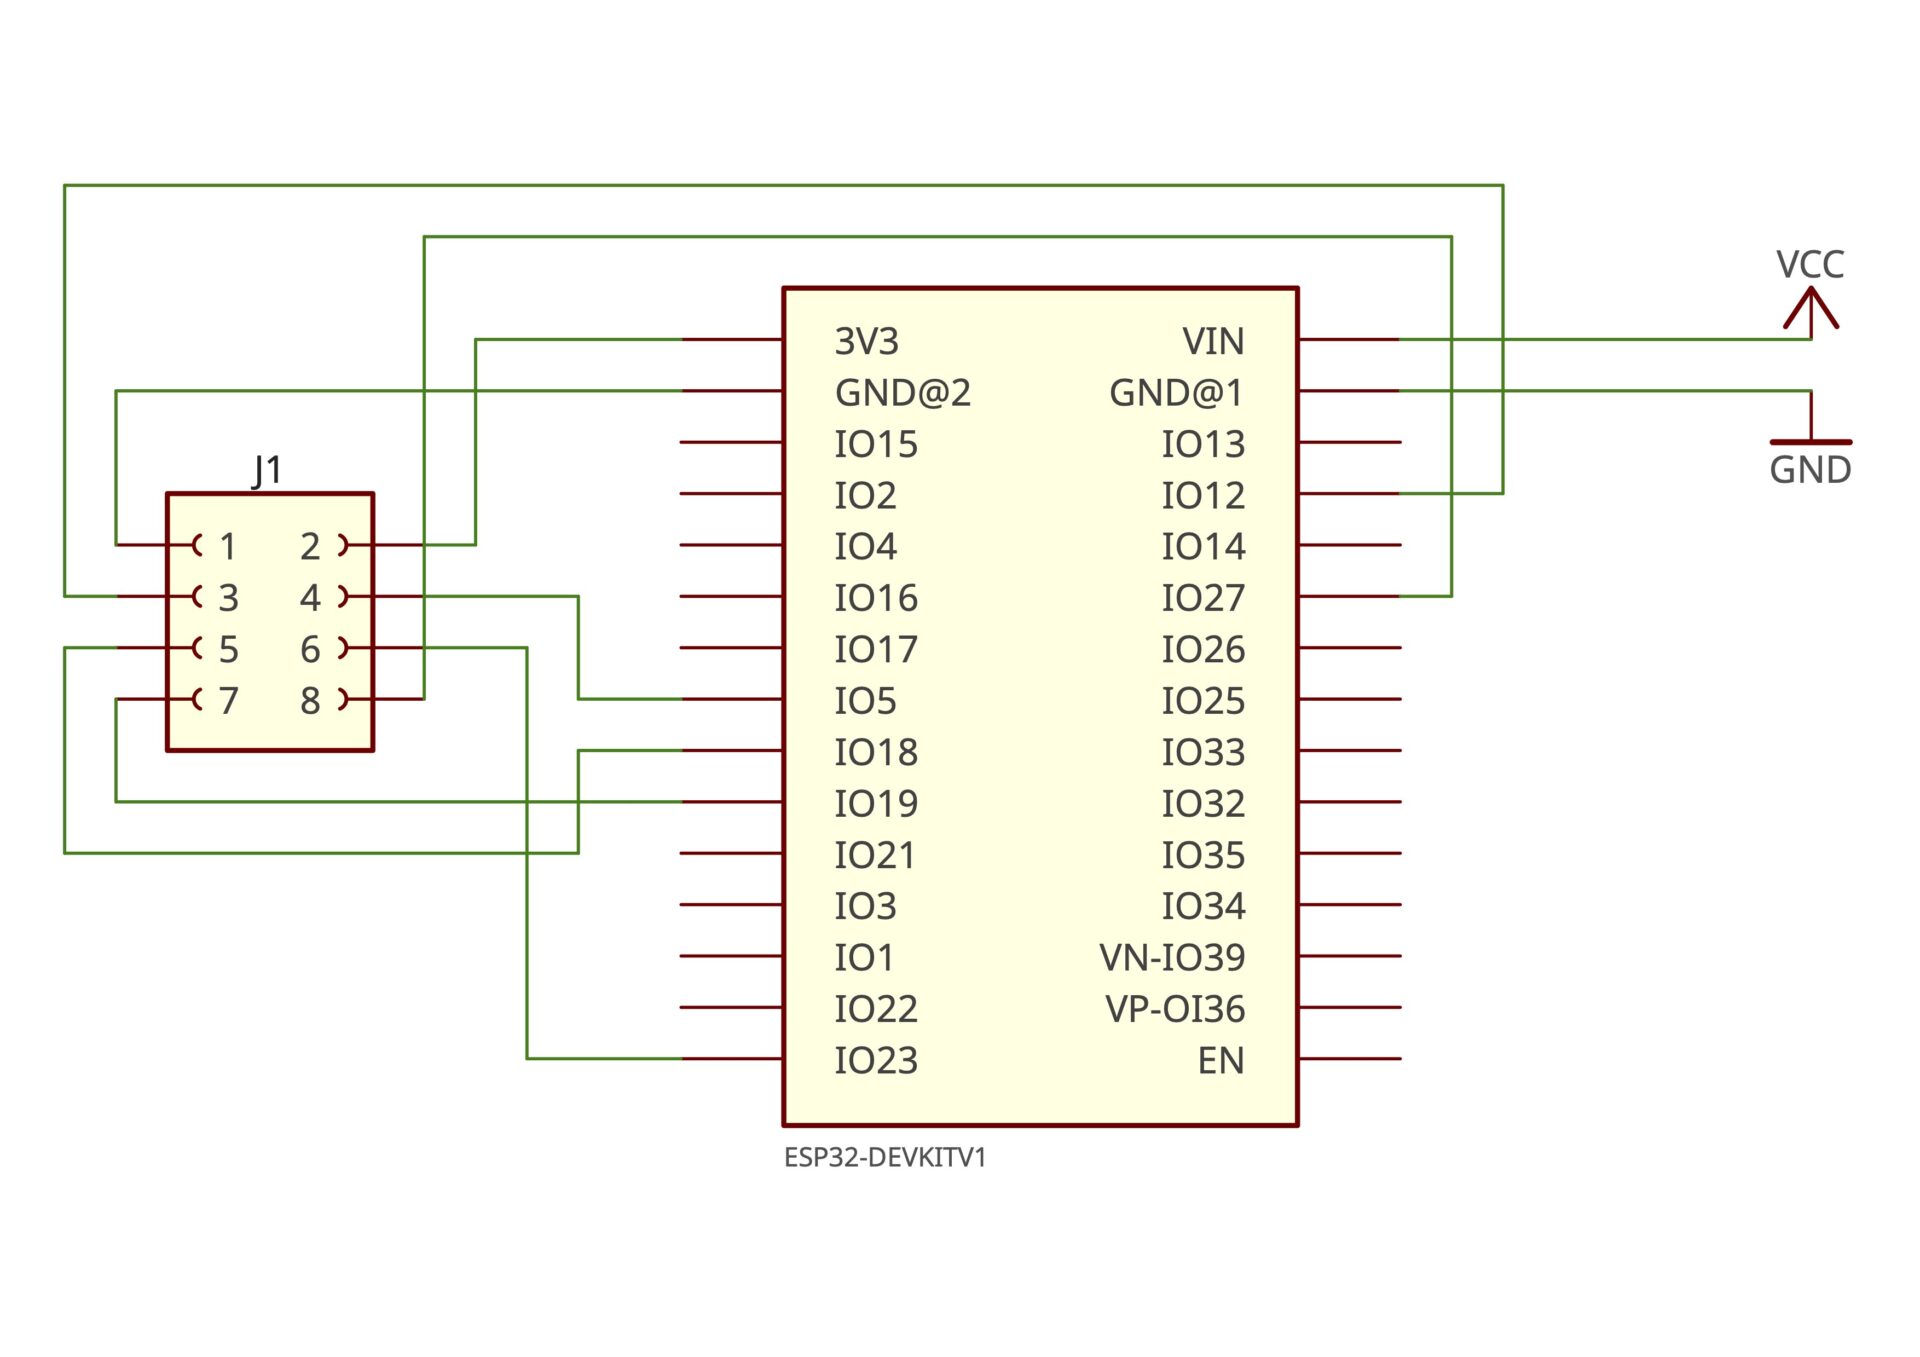
Connect ESP32 and CC1101

Connect the CC1101 radio module to the ESP32. The pins should be connected as follows:

CC1101 Pinout

BoardReceiver Pin(GDO2)Emitter Pin(GDO0)SCKVCCMOSIMISOCSNGND
ESP32D27D12D183V3D23D19D5GND
CC1101 Pinout ESP32 — Please check your specific controller pin out!

Step 2: Install OpenMQTTGateway

Download the latest version of OpenMQTTGateway and install it on your ESP32. You can use the Arduino IDE or PlatformIO for this. Detailed steps can be found in the OpenMQTTGateway documentation.

I installed it directly via the web interface –> https://docs.openmqttgateway.com/upload/web-install.html

Afterwards, you can connect via WiFi and configure everything.

Step 3: Set Up MQTT Broker

You can use any MQTT broker you prefer. Popular choices are Mosquitto or EMQX.

Step 5: Set Up Home Assistant

MQTT Integration

Add the MQTT integration to your Home Assistant. Go to the configuration interface of Home Assistant and select „Integrations“ > „MQTT“ > „Configure“.

Afterwards, the new sensor should be automatically detected.

Conclusion

With these steps, you have successfully integrated your pool radio sensor into Home Assistant. You can now monitor the temperature of your pool at any time and react accordingly. Have fun tinkering and monitoring!

Neueste Beiträge

Upgrade fürs Homelab: Vom 150-€-Mini-Server zum MINISFORUM MS-01 als Heimserver/Homelab: i9-12900H, 10 GbE, USB4 & PCIe-GPU, ideal für LLMs, Docker & Home Assistant

Mein kleiner Mini-Server aus diesem Beitrag läuft immer noch ohne Zicken:
Heimserver für Home Assistant und anderes für ca. 150 Euro.
Aber: Ich bastle inzwischen deutlich mehr mit LLMs, Containern und VMs – also musste etwas Stärkeres her.

Gekauft habe ich nun den MINISFORUM MS-01 als Barebone mit Intel Core i9-12900H (hier)[*],
dazu diese NVMe-SSD (Link)[*] und dieses DDR5-RAM-Kit (Link)[*].

Ergebnis: Setup an, Dienste rübergezogen – fertig. Die Kiste ist im Alltag leise, unter LLM-Last brüllt sie nicht, legt aber hörbar los – so soll’s sein.


Weiter >>

Glas gravieren mit Diodenlaser: So klappt’s mit einfacher Gouachefarbe

Glasgravur für Zuhause: Wie du mit einfacher Wasserfarbe und einem Diodenlaser wie dem Atomstack perfekte Ergebnisse erzielst

Du willst Weingläser, Sektgläser oder Kölschstangen selbst gravieren? Ganz einfach zuhause, ohne teures Profi-Equipment? Dann bist du hier genau richtig! In diesem Artikel zeige ich dir, wie du mit einem Diodenlaser wie dem Atomstack A12 Ultra Pro[*] und einer einfachen schwarzen Wasserfarbe beeindruckende Gravuren auf Glas zauberst.

Das Besondere: Du brauchst keinen teuren Speziallack! Eine ganz normale, deckende Gouachefarbe auf Wasserbasis[*] reicht völlig aus – einfach aufzutragen, abwaschbar und absolut effektiv. Perfekt für Einsteiger, Hobby-Maker und DIY-Fans.


Weiter >>

Your MSPA Goes Smart – Step-by-Step to a DIY Smart Home Hot Tub (Wi-Fi Upgrade)

Introduction

In this article, I’ll show you how I successfully reverse-engineered the serial communication protocol of an MSPA Muse Carlton hot tub. The goal was to read remote control commands and send custom ones. I used an ESP32 Dev Board[*] for this. This protocol likely works with other MSPA models as well.

This article is for makers, home automation enthusiasts, and tech fans who enjoy diving deep into technical systems.


Weiter >>